
Discover the professional vineyard techniques that home gardeners can use to dramatically increase grape size and yield with simple pre-flowering interventions.
The Critical Timing Most Grape Growers Miss
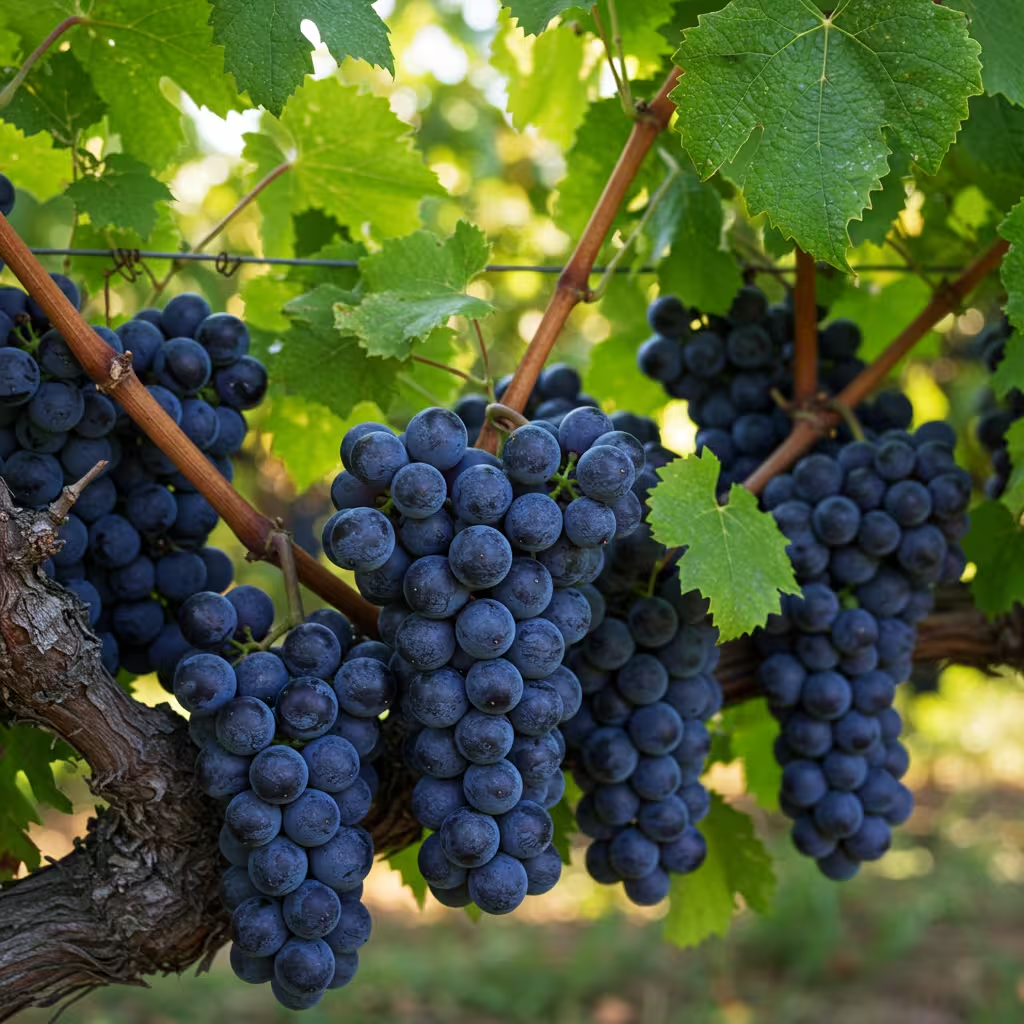
Growing grapes can be one of the most rewarding experiences for any gardener or homesteader. These versatile vines not only provide delicious fruit but also create beautiful, shade-giving structures in the landscape. However, many home growers miss a crucial window of opportunity that professional vintners consider non-negotiable: the pre-flowering period.
This short but pivotal timeframe—typically just a few weeks in late spring—can make the difference between modest grape harvests and truly spectacular clusters that rival those seen in commercial vineyards. Understanding why this period matters and exactly what to do during it can transform your grape-growing success for years to come.
Understanding the Grape Growing Cycle: Why Timing Matters
To appreciate the importance of pre-flowering interventions, we first need to understand the natural growth cycle of grapevines:
- Dormancy (winter): The vine rests, storing energy in its woody structure
- Bud break (early spring): New green growth emerges from the buds
- Shoot development (mid-spring): Rapid growth of new stems and leaves
- Pre-flowering (late spring): The critical period we’re focusing on
- Flowering (early summer): Small flower clusters appear that will become grapes
- Fruit set (early to mid-summer): Flowers transform into tiny grape berries
- Veraison (mid to late summer): Grapes begin changing color and accumulating sugars
- Ripening (late summer to fall): Grapes mature to harvest readiness
Each stage builds upon the previous one, and mistakes or missed opportunities can cascade through the entire growing season. The pre-flowering stage is particularly crucial because it sets the foundation for everything that follows.
Why Pre-Flowering Care Makes Such a Dramatic Difference
During the weeks before flowering, grapevines are making critical “decisions” about resource allocation. The plant is determining:
- How many flowers to produce
- How much energy to invest in each flowering cluster
- Whether to prioritize vegetative growth or reproductive development
Without intervention, many home garden grapevines default to excessive leaf and shoot production at the expense of fruit development. This is especially true in fertile garden soils, which can encourage vigorous foliage growth that actually reduces grape production.
By implementing specific care techniques during this pre-flowering window, you’re essentially communicating with the vine, directing its energy toward creating larger, more numerous grape bunches rather than excess foliage.
The 5-Step Pre-Flowering Protocol for Massive Grape Clusters
Professional vintners follow a systematic approach to pre-flowering care that maximizes both yield and quality. Here’s how to bring these techniques to your home vineyard:
Step 1: Strategic Green Pruning for Energy Redirection
Perhaps the most impactful pre-flowering intervention is selective green pruning—the careful removal of specific vegetative growth to channel the plant’s resources toward fruit production.
What to Remove:
- Suckers and water sprouts: These vigorous, upright shoots emerge from the base of the vine or along the trunk and main branches. They drain energy but produce little or no fruit.
- Excessive lateral shoots: Remove some (not all) of the side shoots growing from main fruiting canes, especially in crowded areas.
- Non-fruiting shoots: Identify shoots without flower clusters and selectively thin them, keeping enough for next year’s fruiting wood.
- Inner canopy growth: Remove shoots growing toward the center of the vine to improve airflow and reduce disease pressure.
Technique Matters:
- Use clean, sharp pruners to make clean cuts
- Prune on a dry, sunny day to allow cut surfaces to heal quickly
- Work systematically from the bottom of the vine upward
- Be judicious—remove no more than 15-20% of the green growth at once
Expert Tip: Look for shoots with flower cluster primordia (tiny pre-flower formations) and prioritize keeping these while removing shoots without them.
Step 2: Custom Pre-Flowering Nutrient Application
The pre-flowering period has specific nutritional requirements that differ from other growth stages. Commercial vineyards use specialized fertilizer blends during this period—here’s how to create your own effective version:
The Ultimate Pre-Flowering Grape Nutrient Formula:
Ingredients:
- 10 liters (approximately 2.5 gallons) of water
- 1 tablespoon of baking soda (provides sodium bicarbonate, which helps balance soil pH)
- 1 tablespoon of wood ash (rich in potassium to support flower and fruit development)
- 1 tablespoon of bone meal or fish meal (provides phosphorus for reproductive growth)
- 1 teaspoon of Epsom salts (optional, provides magnesium for chlorophyll production)
Application Method:
- Mix ingredients in a large container, stirring thoroughly until well combined
- Let the mixture settle for 4-6 hours to allow solids to dissolve
- Apply 1-2 liters directly to the soil around each vine’s root zone
- Water in lightly if soil is very dry
Timing: Apply this mixture 7-10 days before expected flowering for maximum impact.
Expert Tip: For established vines on fertile soil, you can reduce nitrogen inputs at this stage to discourage excessive vegetative growth. Skip any high-nitrogen fertilizers until after fruit set.
Step 3: Foliar Micronutrient Boost
While root feeding provides macronutrients, a foliar spray delivers vital micronutrients directly to the plant tissues where they’re needed most. Research shows that certain micronutrients applied before flowering can significantly increase cluster size and berry uniformity.
Pre-Flowering Foliar Spray Options:
- Seaweed Extract Solution
- Dilute high-quality seaweed extract according to package directions
- Contains natural growth hormones and dozens of trace minerals
- Compost Tea Formula
- Steep finished compost in water for 24-48 hours
- Strain thoroughly to prevent clogging spray equipment
- Contains beneficial microorganisms and humic substances
- Professional Vineyard Micronutrient Blend
- If available, specialized viticulture sprays containing boron, zinc, and manganese can provide targeted nutrition
Application Technique:
- Use a fine mist sprayer to thoroughly coat leaves, especially the undersides
- Apply early morning or late evening to prevent leaf burn
- Ensure coverage of developing flower clusters
- Avoid application if rain is expected within 24 hours
Expert Tip: Adding a drop of mild dish soap per gallon of spray helps the solution adhere to leaf surfaces for better absorption.
Step 4: Water Management Protocol
Water stress during the pre-flowering period can dramatically reduce both the quantity and quality of grape clusters. However, too much water encourages vegetative growth at the expense of flowers. Finding the balance is critical.
The Perfect Pre-Flowering Watering Regimen:
- Maintain consistent soil moisture
- Use your finger to check soil moisture 2-3 inches below the surface
- Water when soil feels slightly dry but not completely dried out
- Apply water slowly and deeply to encourage deep root development
- Apply protective mulch
- Use 2-3 inches of straw, composted bark, or vineyard-specific mulch
- Keep mulch a few inches away from the trunk to prevent rot
- Mulch helps maintain even soil moisture and suppresses competing weeds
- Monitor soil drainage
- Grapevines hate “wet feet”—ensure water doesn’t pool around the base
- Consider raising beds or improving drainage if water retention is an issue
Expert Tip: If using drip irrigation, position emitters to deliver water directly to the root zone, avoiding wetting foliage and developing flower clusters, which can increase disease risk.
Step 5: Canopy Management for Light Optimization
Proper exposure to sunlight is critical for flower cluster development. During the pre-flowering period, ensuring that developing flower clusters receive adequate but not excessive light can increase both cluster size and berry quality.
Canopy Management Techniques:
- Shoot positioning
- Gently spread or separate shoots to prevent overcrowding
- Secure shoots to trellising using soft plant ties or specialized clips
- Ensure developing flower clusters aren’t shaded by excessive foliage
- Leaf removal considerations
- In dense canopies, selective removal of leaves shading flower clusters can help
- Remove only 1-2 leaves per cluster area to prevent sunburn
- Focus on north-facing (southern hemisphere) or east-facing (northern hemisphere) sides of the canopy
- Maintain upright growth
- Guide shoots upward on trellising systems to encourage straight growth
- Avoid allowing shoots to bend or hang downward, which can reduce flowering
Expert Tip: Commercial vineyards often use shoot positioning to create what’s called a “vertical shoot position” (VSP) that maximizes light penetration to the developing flower clusters.
Timing Your Interventions: How to Recognize the Perfect Window
Knowing exactly when to implement these practices is crucial. The pre-flowering period isn’t marked on any calendar—it varies by climate, variety, and even from year to year. Here’s how to identify this critical window:
Visual Indicators of the Pre-Flowering Stage:
- Shoot length
- Most shoots have reached 12-18 inches in length
- Shoots show 5-7 fully expanded leaves
- Flower cluster development
- Flower clusters are visible but remain tight and compact
- Individual flower buds are distinguishable but not yet open
- Clusters are transitioning from green to a lighter yellowish-green
- Growth rate
- Shoot growth has slowed slightly from the rapid early spring flush
- New leaves appear at a steady but not explosive rate
In most growing regions, this stage occurs approximately 3-4 weeks after bud break, but this can vary significantly based on climate and variety. Some early-ripening varieties may reach this stage faster than late-ripening ones.
Variety-Specific Considerations
Different grape varieties respond uniquely to pre-flowering interventions. Understanding these differences can help you tailor your approach:
Table Grapes (e.g., Thompson Seedless, Flame Seedless)
- Generally benefit from more aggressive green pruning
- Often respond well to gibberellic acid treatments (available commercially)
- May require cluster thinning later if set is extremely heavy
Wine Grapes (e.g., Cabernet Sauvignon, Chardonnay)
- Typically need more moderate interventions
- Respond well to balanced nutrient applications
- May benefit from slightly higher potassium levels
American Varieties (e.g., Concord, Niagara)
- Often grow more vigorously than European types
- May require more aggressive canopy management
- Generally more disease-resistant but still benefit from good air circulation
Muscadine Types (Southern United States)
- Benefit from higher magnesium levels in pre-flowering applications
- Typically need less aggressive pruning
- May flower slightly later than other varieties
Common Mistakes to Avoid During Pre-Flowering Care
Even experienced growers sometimes make errors during this critical period. Here are the most common mistakes and how to avoid them:
Over-Pruning
Removing too much foliage at once stresses the vine and can actually reduce flowering. Limit green pruning to no more than 20% of the canopy at one time.
Nitrogen Overload
High-nitrogen fertilizers applied before flowering promote vegetative growth at the expense of fruit development. Save these for after fruit set.
Inconsistent Watering
Alternating between drought and flood conditions stresses vines and reduces flowering. Aim for consistent, moderate moisture.
Poor Timing
Interventions applied too early or too late in the growth cycle won’t have the intended effect. Watch the vine, not the calendar.
Ignoring Disease Prevention
The pre-flowering period is also critical for disease management. Continue regular monitoring for powdery mildew, downy mildew, and other common grape ailments.
The Science Behind the Results: Why This Works
Understanding the physiological reasons these interventions work can help you apply them more effectively:
Hormonal Balance
Pre-flowering interventions help optimize the balance between auxins (which promote vegetative growth) and cytokinins and gibberellins (which promote flowering and fruit development).
Photosynthate Allocation
By reducing competition from excessive vegetative growth, more of the sugars produced through photosynthesis are directed to reproductive structures.
Root-to-Shoot Signaling
Targeted nutrient applications during pre-flowering activate specific metabolic pathways that signal the plant to prioritize reproductive development.
Stress Response Management
Moderate, controlled stress (through careful water management and pruning) can actually increase flowering and fruit set, as the plant responds by focusing on reproduction.
Results You Can Expect: Before and After
When properly implemented, this pre-flowering protocol typically produces dramatic results:
Immediate Season Benefits:
- 30-50% larger grape clusters
- More berries per cluster
- More uniform berry size
- Better disease resistance due to improved air circulation
- More even ripening later in the season
Long-Term Vineyard Improvements:
- Better balanced vines with improved vigor control
- More consistent production year after year
- Stronger flower clusters in subsequent seasons
- Reduced alternate bearing tendencies
- Extended productive lifespan of vines
Adapting These Techniques for Different Growing Systems
The core principles remain the same, but implementation varies slightly depending on how your grapes are grown:
Arbor/Pergola Systems
- Focus more on maintaining an open canopy through the center
- Pay special attention to shoots growing downward, which often receive less light
- Consider removing some interior growth to improve airflow through the structure
Vineyard-Style Trellising
- Emphasize vertical shoot positioning for maximum light exposure
- Maintain narrow canopy walls with good light penetration
- Space shoots evenly along support wires
Fence-Trained Vines
- Prevent overcrowding by spacing shoots along the fence line
- Remove shoots growing toward or away from the fence
- Ensure developing clusters aren’t pressed against the fence material
Conclusion: Your Path to Professional-Quality Grape Harvests
The pre-flowering period represents a golden opportunity to influence your grape harvest dramatically. By implementing these five key practices—strategic green pruning, custom nutrient application, foliar micronutrient boost, proper water management, and thoughtful canopy arrangement—you’re setting your vines up for their best possible performance.
Remember that growing exceptional grapes is both a science and an art. While these techniques are based on commercial viticultural research, don’t be afraid to observe your specific vines and adjust your approach based on their response. Each vineyard has its unique microclimate and conditions.
With consistent application of these methods, you’ll soon be harvesting grape clusters that make visitors ask, “What’s your secret?” The satisfaction of growing truly exceptional grapes—whether for fresh eating, juicing, winemaking, or simply garden beauty—makes the effort during this brief but crucial pre-flowering period more than worthwhile.