
Growing onions from seed offers gardeners incredible variety and substantial cost savings compared to sets or transplants. However, the first few weeks after germination represent a critical window that can make or break your onion harvest. The care you provide during this early stage lays the foundation for robust bulb development later in the season.
Many gardeners overlook these crucial early interventions, leading to weak, spindly onions that never reach their full potential. By implementing specific practices the moment your onion seedlings emerge, you’ll dramatically improve your chances of growing thick, flavorful bulbs that store beautifully.
This comprehensive guide reveals the essential steps professional growers take to transform delicate onion sprouts into garden powerhouses.
Why the First Few Weeks Matter So Much for Onion Success
Onions have a relatively long growing season, typically requiring 90-120 days from transplanting to harvest, with several additional weeks of growth as seedlings. What happens during those initial weeks after germination significantly impacts the plant’s entire development cycle.
Young onion seedlings establish critical root architecture and energy reserves during this period that directly influence:
- Final bulb size: Larger, healthier seedlings typically develop into larger bulbs
- Disease resistance: Strong early growth creates plants better able to withstand challenges
- Storage quality: Properly grown seedlings often produce onions that cure better and store longer
- Overall yield: Early interventions can dramatically increase the percentage of successfully formed bulbs
Unlike some vegetables that can overcome early setbacks, onions have a more deterministic growth pattern. Problems during the seedling stage often cannot be fully corrected later, making these early weeks disproportionately important to your final harvest.
Step 1: Optimize Light Conditions Immediately After Germination
The moment your onion seeds germinate, providing proper light becomes your top priority. Inadequate lighting during the first days after emergence is the primary cause of leggy, weak seedlings that never develop properly.
The Critical Light Requirements for Onion Seedlings
Intensity: Onion seedlings require significantly more light than many other vegetable seedlings—a minimum of 14-16 hours of direct light daily.
Proximity: Position grow lights just 1-2 inches above seedling tops to prevent stretching. Adjust the height upward as seedlings grow.
Spectrum: Full-spectrum lights that provide both blue and red wavelengths produce the sturdiest seedlings. Blue light, in particular, encourages compact, strong growth.
Practical Lighting Solutions for Home Growers
Indoor Setup Options:
- LED grow lights: The most energy-efficient option, providing excellent spectrum control
- Fluorescent shop lights: An affordable option using T5 or T8 full-spectrum bulbs
- South-facing windowsill: Only if extremely bright and supplemented with reflective materials
Key Implementation Tips:
- Set lights on a timer to ensure consistent duration
- Use reflective materials (aluminum foil, white poster board) around seedling trays to maximize light exposure
- Rotate trays 180° daily if using natural light to prevent leaning
- Position lights closer than you might for other seedlings—onions benefit from this proximity
Providing insufficient light for even a few days can result in permanently compromised plants, so prioritize this step above all others immediately after germination.
Step 2: Master the Art of Proper Seedling Watering
Watering practices during the seedling stage significantly impact onion development. Incorrect moisture levels can lead to damping-off disease, stunted growth, or root problems that affect the plant throughout its life cycle.
Bottom Watering: The Professional Method
Bottom watering is the preferred technique for onion seedlings because it:
- Keeps foliage dry, reducing disease risk
- Encourages deeper root development
- Provides more consistent moisture levels
- Prevents soil compaction and seedling disturbance
How to Bottom Water Effectively:
- Place seed trays in a shallow container or tray
- Add room-temperature water to a depth of ½ inch
- Allow soil to absorb moisture for 10-30 minutes
- Remove trays once the soil surface appears damp
- Never leave seedlings sitting in water for extended periods
Moisture Monitoring and Management
Signs of Proper Moisture:
- Soil appears dark but not glistening wet
- Seedlings stand upright and appear vibrant
- Seed starting mix feels damp but not sodden when touched
Warning Signs to Watch For:
- Dry, light-colored soil surface indicates underwatering
- Algae growth suggests excessive moisture
- Wilting seedlings may indicate either extreme
- Fallen seedlings often point to damping-off from overwatering
Professional Tip: Use a spray bottle with room-temperature water for gentle top watering if the soil surface becomes extremely dry, but rely primarily on bottom watering for routine moisture management.
Step 3: Implement an Early Fertilization Program
Unlike some seedlings that thrive on minimal fertility, onions benefit from early, light feeding to support their development. The key is providing nutrients at the right time and in appropriate concentrations.
Timing Your First Feeding
Begin fertilizing only after:
- The first true leaf has emerged (the thin, hollow leaf that follows the initial sprout)
- Seedlings have been growing for approximately 7-10 days
- Root systems have visibly developed
Fertilizing too early can damage tender seedlings, while waiting too long limits their growth potential.
Selecting the Right Fertilizer Type
Recommended Options:
- Liquid fish emulsion: Diluted to quarter-strength (approximately 5ml per gallon)
- Seaweed extract: Rich in micronutrients that support root development
- Balanced organic liquid fertilizer: Diluted to half the recommended strength
- Compost tea: Strained thoroughly to prevent clogging when applying
Application Method:
- Apply diluted fertilizer during a regular bottom watering session
- Ensure even distribution throughout the growing medium
- Return to clear water for the next 1-2 waterings
Frequency:
- Every 10-14 days throughout the seedling stage
- Gradually increase concentration to half-strength as seedlings develop multiple leaves
Step 4: The Haircut Technique: Trimming for Stronger Onions
One of the most counterintuitive yet effective techniques for growing robust onion seedlings is regular trimming—essentially giving your seedlings a “haircut” to promote strength and thickness.
The Science Behind Trimming
Trimming onion seedlings:
- Redirects energy to root development rather than excessive top growth
- Encourages thicker, sturdier stems that resist damage
- Prevents tangling and falling over
- Creates a more uniform crop overall
Proper Trimming Technique
When to Start: Begin trimming when seedlings reach approximately 4 inches in height, typically 3-4 weeks after germination.
How to Trim:
- Use clean, sharp scissors or garden shears
- Cut across all seedlings in the flat, reducing height to about 3 inches
- Make clean cuts rather than tearing the foliage
- Remove trimmings to prevent disease issues
Maintenance Schedule:
- Repeat trimming every 1-2 weeks as needed
- Never remove more than one-third of the growth at once
- Continue until 1-2 weeks before transplanting
Bonus Benefit: The trimmed tops are perfectly edible—use them like chives in salads, soups, or as a garnish, providing an early harvest while improving your main crop.
Step 5: Create Optimal Air Circulation for Disease Prevention
Poor air movement around young onion seedlings creates conditions favorable for damping-off and other fungal diseases that can decimate your crop overnight. Implementing proper ventilation strategies significantly improves seedling health and vigor.
Spacing for Success
Initial Seeding:
- Avoid overcrowding by seeding lightly
- For broadcast-seeded trays, thin seedlings once they reach 1 inch in height
- Maintain approximately ¼ inch between individual seedlings
- Remove the weakest seedlings, keeping only the strongest
Active Air Movement Strategies
Indoor Fan Setup:
- Position a small oscillating fan near seedlings
- Run on the lowest setting to create gentle air movement
- Place 3-4 feet away to avoid direct, harsh airflow
- Operate for 2-3 hours at different intervals during the day
Additional Circulation Tips:
- Remove humidity domes completely once 50% of seeds have germinated
- Ensure growing area has adequate general ventilation
- Avoid placing seedling trays in enclosed cabinets or spaces
- If growing near windows, open them briefly on warm days
Signs of Inadequate Air Circulation
Watch for these warning signs that indicate ventilation problems:
- White, fuzzy growth on seedlings or soil (mold)
- Seedlings suddenly falling over at the soil line (damping-off)
- Water droplets remaining on foliage for extended periods
- Soil staying wet for days after watering
Step 6: Hardening Off: The Crucial Transition Phase
The hardening off process prepares indoor-grown seedlings for outdoor conditions and represents one of the most critical transitions in the onion growing cycle. Properly hardened seedlings transplant successfully and resume growth quickly, while improperly hardened plants may suffer shock, stunting, or complete failure.
The Ideal Hardening Off Timeline
When to Begin: Start the hardening off process when:
- Seedlings have at least 3-4 true leaves
- They’re approximately the thickness of a pencil lead
- Outdoor temperatures have moderated
- About 1-2 weeks before planned transplanting date
Day-by-Day Schedule:
Day 1-2: Place seedlings in a protected outdoor location with filtered sunlight (under a tree or on a covered porch) for 2-3 hours, preferably during the mild part of the day.
Day 3-4: Increase exposure to 4-5 hours, introducing a bit more direct sunlight during the gentlest part of the day.
Day 5-7: Extend time outdoors to 6-8 hours, with greater exposure to normal sunlight and gentle breezes.
Day 8-10: Leave plants out for the full day, bringing them in only if temperatures drop below 40°F (4°C).
Day 11-14: Begin leaving plants out overnight if temperatures remain above 40°F (4°C), otherwise continue bringing them in at night.
Environmental Considerations During Hardening Off
Temperature Management:
- Onion seedlings can tolerate cool temperatures but not freezing
- Bring plants indoors if temperatures drop below 40°F (4°C)
- Use cold frames or row covers for protection during the hardening off period
- Be especially cautious of cold spring winds, which can damage seedlings
Watering Adjustments:
- Monitor moisture more frequently as outdoor conditions often dry soil faster
- Water early in the day to ensure foliage dries before evening
- Continue bottom watering when possible to maintain consistency
- Adjust frequency rather than volume when adapting to outdoor conditions
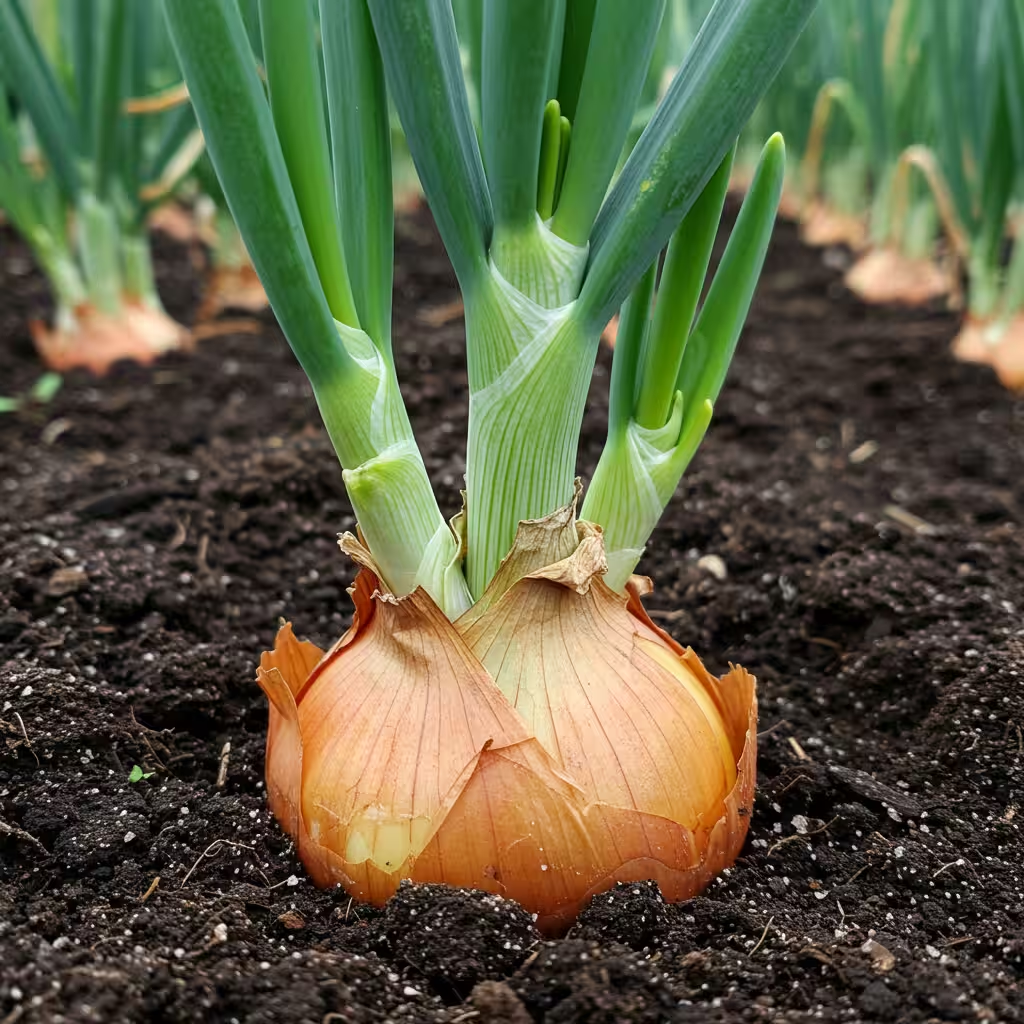
Step 7: Transplanting Techniques for Seamless Establishment
The final step in seedling care involves properly moving your onion plants to their permanent growing location. Successful transplanting minimizes shock and allows seedlings to quickly resume active growth.
Timing Your Transplant
Optimal Seedling Indicators:
- Thickness approximately that of a pencil
- 4-5 true leaves developed
- Height of 6-8 inches (after trimming)
- Strong root system visible when gently removed from container
Seasonal Timing:
- Early spring, once soil can be worked
- 2-4 weeks before your last expected frost
- When soil temperatures reach at least 50°F (10°C)
- During overcast or cool weather conditions when possible
Site Preparation
Soil Requirements:
- Well-draining, fertile soil with pH 6.0-7.0
- Incorporated compost or aged manure
- No fresh manure or high-nitrogen amendments
- Raked to a fine, level seedbed
Pre-Planting Considerations:
- Water seedlings thoroughly several hours before transplanting
- Prepare planting holes before removing seedlings from trays
- Have all supplies ready to minimize time roots are exposed
Transplanting Process
Step-by-Step Technique:
- Water seedlings thoroughly several hours before transplanting
- Loosen soil around seedlings gently with a fork or transplanting tool
- Lift seedlings carefully, holding by leaves rather than stems
- Create furrows or individual holes 1-2 inches deep
- Place seedlings in holes at the same depth they were growing before
- Space 4-6 inches apart in rows 12-18 inches apart
- Firm soil gently around roots without compacting
- Water immediately after planting with a gentle shower
Post-Transplant Care:
- Apply liquid seaweed or dilute fish emulsion to reduce transplant shock
- Provide temporary shade with row cover if conditions are sunny
- Keep soil consistently moist for the first 7-10 days
- Hold off on additional fertilizer until new growth appears
Common Problems and Solutions During the Seedling Stage
Even with proper care, onion seedlings sometimes develop issues. Identifying and addressing problems quickly can save your crop.
Legginess (Stretched, Thin Stems)
Causes:
- Insufficient light intensity
- Lights positioned too far above seedlings
- Excessive heat
- Overcrowding
Solutions:
- Move lights closer (1-2 inches above plants)
- Increase light duration to 16 hours
- Provide cooler growing temperatures (60-65°F ideal)
- Begin trimming program as described earlier
Damping Off (Seedlings Collapse at Soil Line)
Causes:
- Overwatering
- Poor air circulation
- Contaminated containers or soil
- Cool, damp conditions
Solutions:
- Reduce watering frequency
- Improve ventilation immediately
- Remove affected seedlings promptly
- Apply cinnamon (a natural anti-fungal) lightly to soil surface
Yellow or Pale Leaves
Causes:
- Nutrient deficiencies
- pH imbalance in growing medium
- Overwatering
- Insufficient light
Solutions:
- Begin light fertilization program
- Ensure growing medium has proper pH (6.0-6.5)
- Allow soil surface to dry between waterings
- Increase light intensity
Stunted Growth
Causes:
- Temperature extremes
- Root binding
- Insufficient nutrients
- Poor quality seed
Solutions:
- Maintain temperatures between 60-75°F (15-24°C)
- Transplant to larger containers if needed
- Implement fertilization program
- Note varieties that perform poorly for future reference
Conclusion: The Path to Onion Growing Success
The care you provide during the first few weeks after onion seeds germinate establishes the foundation for your entire harvest. By implementing these seven critical steps—optimizing light, mastering watering, beginning early fertilization, trimming for strength, ensuring proper air circulation, carefully hardening off, and transplanting correctly—you set your onion crop on the path to success.
Remember that onions respond dramatically to proper early care, more so than many other vegetables. The time and attention you invest during this critical window will be rewarded with robust plants that develop into large, flavorful bulbs that store beautifully.
Whether you’re growing sweet Walla Wallas, pungent storage types, or colorful specialty varieties, these fundamental techniques apply across all onion types and will significantly improve your results. Start with quality seeds, implement these proven practices, and enjoy the satisfaction of growing perfect onions from seed to harvest.